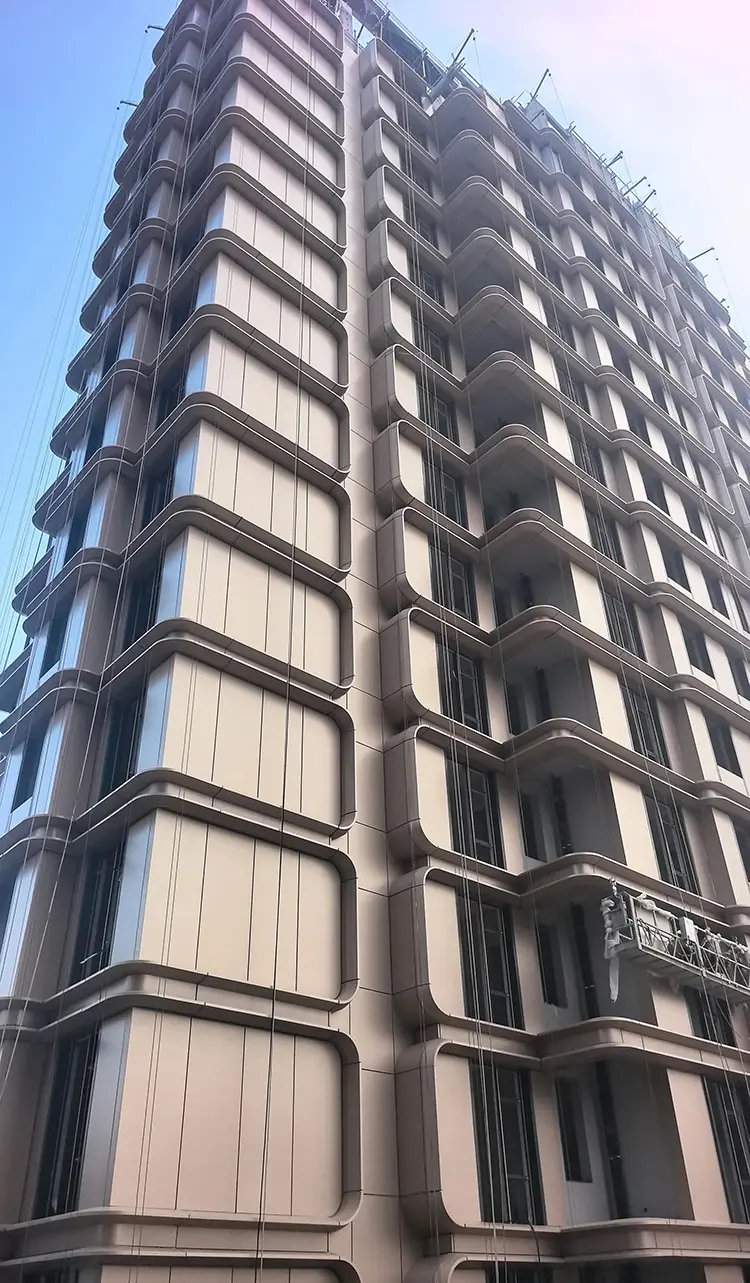
Proper installation is the difference between a facade that performs for decades and one that develops problems within months. Aluminum veneer panels are precision-engineered products, and their long-term performance depends heavily on correct handling and installation. This guide covers everything a facade contractor needs to know — from material receiving to final sealant inspection.
1. Pre-Installation Preparation
Site Inspection and Substrate Check
Before any panel is lifted into position, verify that the building substrate or existing curtain wall framework meets these requirements:
- Structural soundness — All anchor points and support brackets must be secured to load-bearing elements, not cladding alone.
- Flatness tolerance — The supporting frame should not deviate more than ±3 mm over a 2-meter span. Any deviation above this will show on the finished panel surface.
- Moisture barrier — Confirm a suitable weather-resistant barrier (WRB) is in place behind the panel system, especially for non-ventilated facades.
- Thermal break — For high-performance buildings, ensure thermal isolation pads are installed at all bracket-to-structure connection points to reduce thermal bridging.
Material Receiving and Storage
Aluminum veneer panels arrive with a protective PE film on the PVDF-coated surface. Upon delivery:
- Inspect each crate for shipping damage before signing off.
- Store panels in a dry, covered area. Do not stack panels directly on the ground — use timber sleepers at least 100 mm high to allow airflow underneath.
- Keep the protective film intact until the panel is installed and ready for final cleaning. Remove it within 30 days of installation to prevent UV adhesion.
- Acclimate panels to the site environment for at least 24 hours before installation, especially if the site has different temperature/humidity conditions from the storage facility.

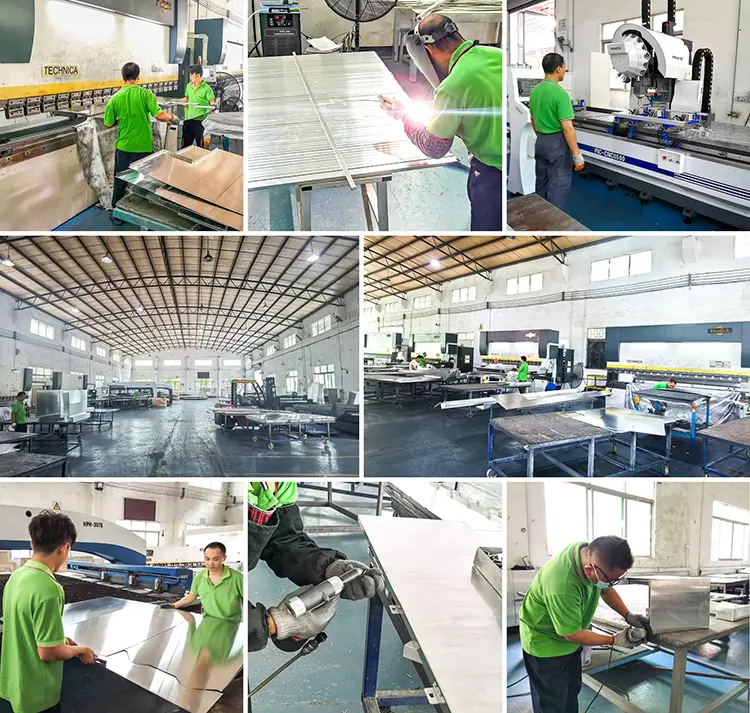
2. Tools and Equipment Required
- Lifting equipment — Vacuum lifters or panel manipulators for panels over 2 m². Manual handling for smaller panels, with suction cup handles.
- Measuring and alignment — Laser level, theodolite, spirit level (1 m and 2 m), digital caliper.
- Fastening tools — Torque-controlled screwdriver/drill for self-tapping screws. Rivet gun for structural rivets.
- Cutting tools — If field cutting is necessary (avoid where possible), use a circular saw with a fine carbide-tipped blade (80+ teeth) or a jigsaw with a metal-cutting blade. Never use an angle grinder — the heat can damage the PVDF coating.
- Sealant application — Caulking gun, backer rod insertion tool, masking tape, and sealant finishing tools.
- Safety equipment — Full fall protection harness for work at height, safety glasses, hearing protection, and cut-resistant gloves for handling aluminum edges.
3. Step-by-Step Installation Process
Step 1: Panel Layout Planning
Before installation begins, mark out the full panel layout on the building facade using laser levels. Verify all panel dimensions against the approved shop drawings. Check that expansion joints are correctly positioned — aluminum panels expand and contract with temperature, and inadequate expansion gaps are the most common installation failure.
Recommended expansion joint width: 10–15 mm for panels up to 1500 mm wide; 15–20 mm for larger panels.
Step 2: Subframe and Anchoring System Installation
The subframe supports all panel loads and transfers them to the building structure. For aluminum veneer panel facades:
- Use hot-dip galvanized steel or 6063-T5 aluminum alloy brackets and rails.
- Install vertical rails at centers of 600–900 mm, depending on wind load calculations.
- Anchor brackets to the building structure with stainless steel expansion bolts or chemical anchors. Never use carbon steel fasteners in direct contact with aluminum — galvanic corrosion will occur.
- Use stainless steel washers and shims to adjust the subframe to exact alignment. The subframe must be perfectly plumb and level before any panel is attached.

Step 3: Panel Positioning and Fixing
Each panel should be carefully lifted into position and temporarily supported while alignment is verified:
- Start from a reference point — typically the building corner or a known column line — and work outward.
- Visible fixing — Self-tapping screws through the panel face into the subframe. Use color-matched screw caps for a clean finish.
- Concealed fixing — Panels with folded edges hook onto the subframe, secured with cleats or brackets. This provides a cleaner facade appearance but requires more precise panel fabrication.
- Torque all fasteners to the manufacturer’s specification. Over-tightening can deform the panel; under-tightening risks loosening under wind load.
Step 4: Leveling, Alignment, and Plumb Check
After every 5–10 panels are installed, perform a comprehensive alignment check:
- Horizontal alignment: Check every panel joint with a 2-meter spirit level.
- Vertical alignment: Use a theodolite or laser plumb line at every column line.
- Panel surface flatness: Lay a straight edge across adjacent panels — deviation should not exceed 1 mm at the joints.
- Joint width consistency: Measure at three points along each joint. Variation should be within ±1 mm.
Adjustments should be made immediately. Once the panel is fully fastened and the next row is installed above it, realignment becomes significantly harder.
Step 5: Weather Sealing and Joint Treatment
Proper sealing is what makes a facade weathertight. This step demands the most care:
- Install closed-cell polyethylene backer rod into the joint gap — this controls the depth of the sealant and creates a proper hourglass cross-section.
- Apply masking tape to both sides of the joint (on the panel surface) before sealant application.
- Use a high-performance silicone sealant rated for structural glazing (ASTM C920 Class 25 or equivalent). For PVDF-coated panels, verify sealant compatibility with the coating — some sealants cause staining.
- Tool the sealant within 10 minutes of application using a concave finishing tool for a smooth, weather-shedding profile.
- Remove masking tape immediately after tooling, before the sealant skins over.
- Curing time: Minimum 7 days before the sealant reaches full structural strength. Avoid disturbing the joints during this period.

4. Common Installation Mistakes to Avoid
- Insufficient expansion joints — In hot climates, panels can expand 2–3 mm per meter of panel width. Without adequate gaps, panels will buckle. Always follow the manufacturer’s thermal expansion calculations.
- Direct metal-to-metal contact — Aluminum in contact with steel or concrete can cause galvanic corrosion. Use EPDM gaskets, nylon washers, or neoprene pads at all dissimilar metal interfaces.
- Removing protective film too early — The PE film protects the PVDF coating during installation. Remove it only after all work near the facade (welding, grinding, sealant application) is complete. However, do not leave it on longer than 30 days — UV exposure makes it brittle and difficult to peel.
- Over-tightening fasteners — This can create visible depressions in the panel surface. Use torque-controlled tools set to the panel manufacturer’s specification.
- Ignoring wind load calculations — Each installation site requires specific engineering for local wind loads. A facade that performed well in a sheltered location may fail in an exposed high-rise setting.
5. Quality Control Checklist
Use this checklist before signing off each section of the facade:
- All panels are within ±1.5 mm flatness tolerance across joints.
- Joint width is consistent (±1 mm tolerance) throughout the elevation.
- Sealant adhesion is sound — no gaps, bubbles, or uncured sections.
- Sealant tooling is clean and uniform; masking tape residue is removed.
- All fasteners are torqued to specification and visible fixings have color-matched caps.
- Protective film is removed (or removal is scheduled within 30 days).
- Drainage paths at the base of the facade are clear and unobstructed.
- Expansion joints function freely — no panel contact at expected movement points.
6. Post-Installation Maintenance
A well-installed aluminum veneer panel facade requires minimal maintenance. Recommended schedule:
- Every 6 months — Visual inspection for sealant cracks, loose panels, or drainage blockages.
- Annually — Clean panels with mild detergent and soft cloth or pressure washer (max 80 bar, held at least 300 mm from the surface). Avoid abrasive cleaners or brushes that can scratch the PVDF coating.
- Every 5 years — Full re-inspection of all sealant joints, gaskets, and anchor points. Replace any failing sealant before water ingress causes damage to the substrate.
Conclusion
Successful aluminum veneer panel installation comes down to preparation, precision, and attention to the details that matter: proper subframe alignment, correct expansion joints, careful sealant application, and quality control at every stage. By following the practices outlined in this guide, facade contractors can deliver installations that perform reliably for decades.
For specifiers and project managers, understanding the installation process is equally important — it helps you evaluate contractor bids, set realistic quality standards for your next project, and specify the right panel system from the start. Read our PVDF Aluminum Veneer Panel Specifier Guide for detailed guidance on selecting the right coating and thickness specifications. For fire safety considerations on high-rise installations, see our Aluminum Facade Fire Safety Guide.
Need custom-fabricated aluminum veneer panels for your next project? Contact Likton Metal for a quote or technical consultation.